Upgrading my Anet A8 to a Hypercube

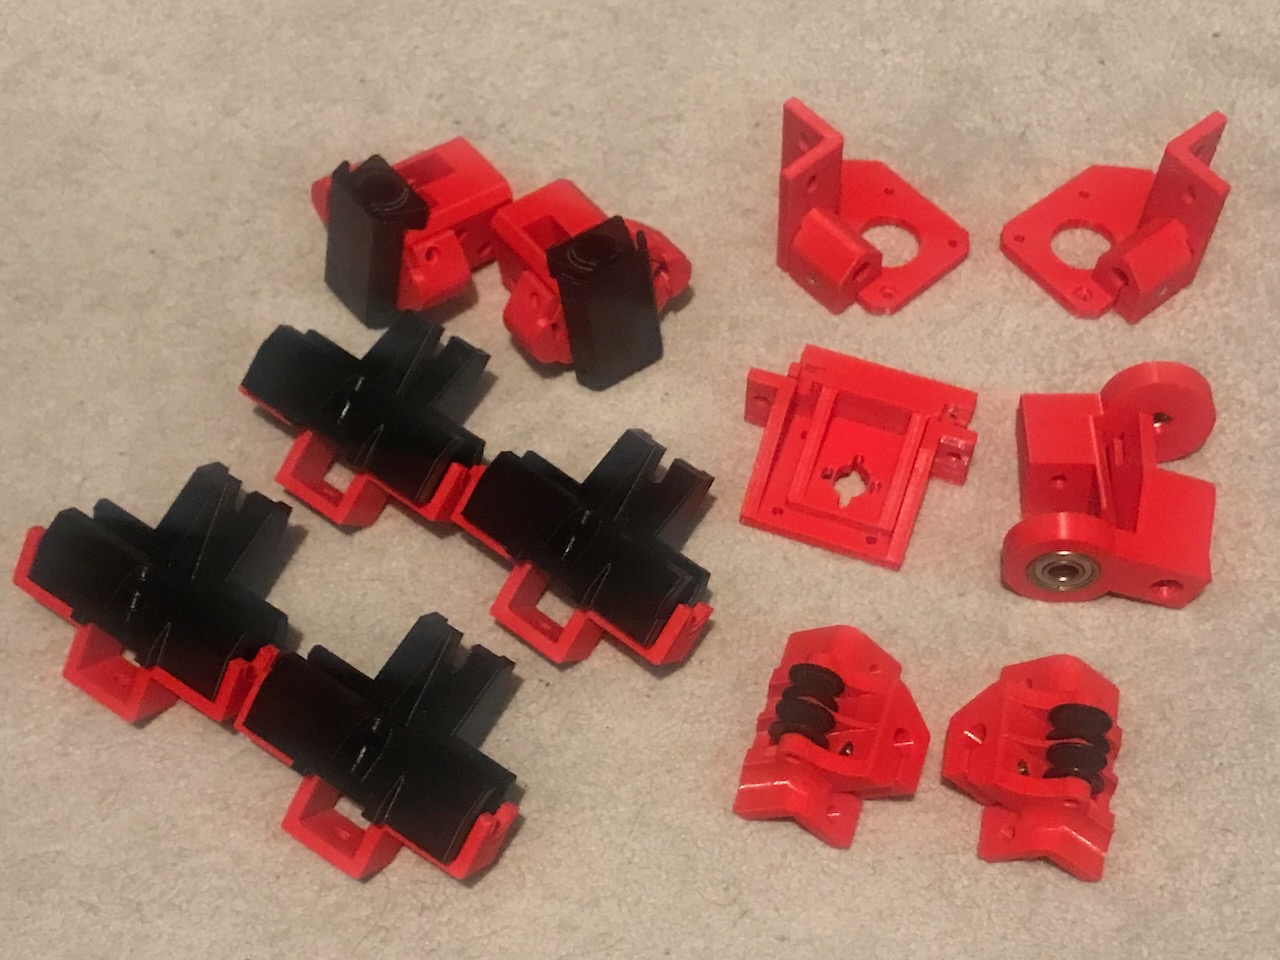
Table of contents
Intro
I had originally intended to migrate from the Anet A8's acrylic frame to a CoreXY Hypercube style printer. I thought that it may be a bad idea to modify my only printer in case I need to print other parts so have decided to build a new printer instead.
Frame
Since upgrading to SuperSlicer, I have pushed my printing speeds to the limit of what stock Anet A8 acrylic frame can cope with.
I have stiffened the frame as much as I can with 3D printed upgrades so I have now been looking at a number of different projects to upgrade the somewhat flexible plastic frame with a metal alternative.
Some of the ones I have found are:
AM8
The AM8 is a direct drop in replacement for the acrylic frame on the Anet A8. This looks to be the easiest upgrade path that would do the job of getting a stiff frame on the printer, however, I would like the ability to upgrade the machine further in the future.
For the price of this frame upgrade, it would probably be better just to buy the upgraded version of the Anet A8, The Anet A8 plus which would also give me an upgraded build volume.
Hypercube
The Hypercube is a printer that uses a different way of moving the extruder around, known as CoreXY kinamatics, whereas the Anet A8 uses Cartesian kinematics. There is a Remix specialising in upgrading the Anet A8 to a Hypercube called the Anet Evolution.
Hypercube Evolution
The Hypercube Evolution is, as the name implies, a progression on the Hypercube. It also has a Remix devoted to upgrading an Anet A8 or AM8, Anet A8/AM8 to Hypercube Evolution Upgrade Path.
It is based on 3030 Extrusion... having looked around on the internet I have concluded that 3030 extrusion is very hard to source in the UK (especially looking for somewhere that provides custom cut lengths).
RatRig
There are a number of printers in the RatRig lineup however many of them use custom plates that you will either need to buy off them as a kit or have custom machined. I would like to self source parts if required to upgrade the printer in stages.
Voron Design
Voron is an open source project designed to create a 3D printer using only off the shelf and 3D printed parts.
They have a number of Printers in their current line up:
What I have chosen
I really like the idea of learning something new by upgrading the printer to CoreXY kinamatics, this rules out the AM8 and the Voron Switchwire. I also want to be able to incrementally upgrade the printer parts at a time rather than buying a kit and building a new printer (kinda like Trigger's broom I like the idea that it is the same printer at the end). This also rules out buying a RatRig or a Voron kit. I have found it rather difficult to source 3030 extrusion in the UK so that rules out the Hypercube Evolution.
This leaves one option left, the Hypercube, this is a rather old design so I am going to start with this as a base, using ideas and remixes from the Anet Evolution... but using a frame from an older revision of the Voron Trident, the Voron1. The four vertical corner extrusions, and the four front and rear extrusions on the 300mm Spec Voron 1.8 frame are exactly the same size as the ones required for the Anet Evolution. The 6 side extrusions, however, are 40mm longer.
What I am planning on doing to remedy this is instead of using 2 380mm smooth guide rods for the Z axis and two for the Y axis from the Anet A8 that the Anet Evolution suggests. I am going to use all four 380mm guide rods for the Z axis, like in the double Z axis version of the Hypercube Evolution. I will then purchase 2 new 400mm smooth guide rods to use for the Y axis. These seem to come in standard sizes and therefore may be about 20mm short, if this is the case I will modify the motor mounts and belt idlers to fit the rods.
The other reason for purchasing the frame for the Voron 1.8 instead of purchasing custom cut extrusion is that it is fairly difficult to find aluminium extrusion in the UK that is NOT V-slot. I want T-slot extrusion so that I have the ability to install MGN9 linear rails in the future. As the name suggests MGN9 rails are 9mm wide however the widest part of V-Slot extrusion is 11mm wide, therfore the rail would not fit flat on the V-slot.
The kit I purchased also comes with the extrusions to build the electronics case into the rear of the printer (the newer Trident and Voron2 moved their electronics to the bottom of the printer) which means that I will not need to find or design an electronics case to fit, the Anet Evolution only has a case for the stock Anet A8 electronics.
X Axis
To start off with I will not be deviating too far from the Anet Evolution. I will be printing the Belt clamp with belt tensioners from that and eventually plan to upgrade the toolhead in the future.
| Item | Quantity | Material | Size | Weight | Cost | Printed |
|---|---|---|---|---|---|---|
| 1_Carriage_X_NewVersion | 1 | Tinmorry PETG (Black) | 8.82m | 30.77g | £0.62 | ✔️ |
| 2_Belt_Clamp.stl | 2 | Amazon Basics PETG (Red) | 0.59m | 2.05g | £0.04 | ✔️ |
| 4_Belt_Tensioner | 4 | Amazon Basics PETG (Red) | 0.08m | 0.29g | £0.01 | ✔️ |
There is also an adapter plate, Hypercube Afterburner adapter intergration remix that may work to mount an Afterburner on the guide rails.
Y Axis
I have chosen to replace the stock Y carriages with a remixed version by osvalijr as I prefer the modularity of them and it will allow me to print the bearing blocks in a different accent colour.
| Item | Quantity | Material | Size | Weight | Cost | Printed |
|---|---|---|---|---|---|---|
| 1x_Conjunto_Y_Corpo | 2 | Amazon Basics PETG (Red) | 12.99m | 45.30g | £0.87 | ✔️ |
| 1x_Conjunto_Y_Trava | 2 | Tinmorry PETG (Black) | 1.64m | 5.71g | £0.11 | ✔️ |
| 2x_Conjunto_Y_Bucha | 4 | Tinmorry PETG (Black) | 1.57m | 5.30g | £0.11 | ✔️ |
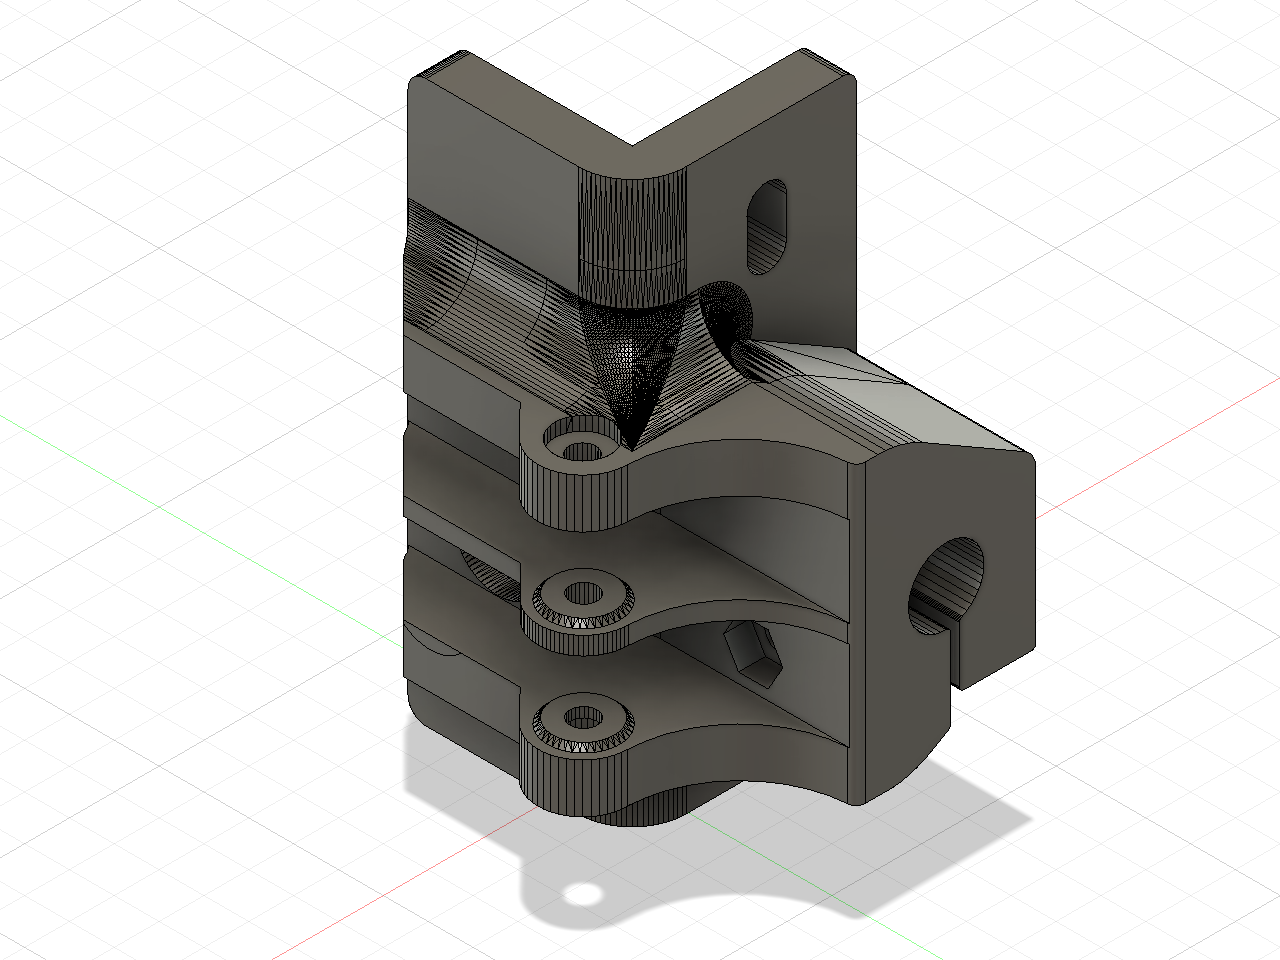
As I have a slightly longer Y axis compared to the Anet Evolution, I have redesigned some parts to allow me to use Y Guide rods that are 20mm too short for the frame.
I remixed the Belt Idlers from the reinforced ones by yoloswagersaurus I extended the Y rod clamps by 13mm to make the full width of the Y clamps 25mm.
| Item | Quantity | Material | Size | Weight | Cost | Printed |
|---|---|---|---|---|---|---|
| XY Idler Left | 1 | Amazon Basics PETG (Red) | 9.63m | 33.58g | £0.64 | ✔️ |
| XY Idler Right | 1 | Amazon Basics PETG (Red) | 9.60m | 33.48g | £0.64 | ✔️ |
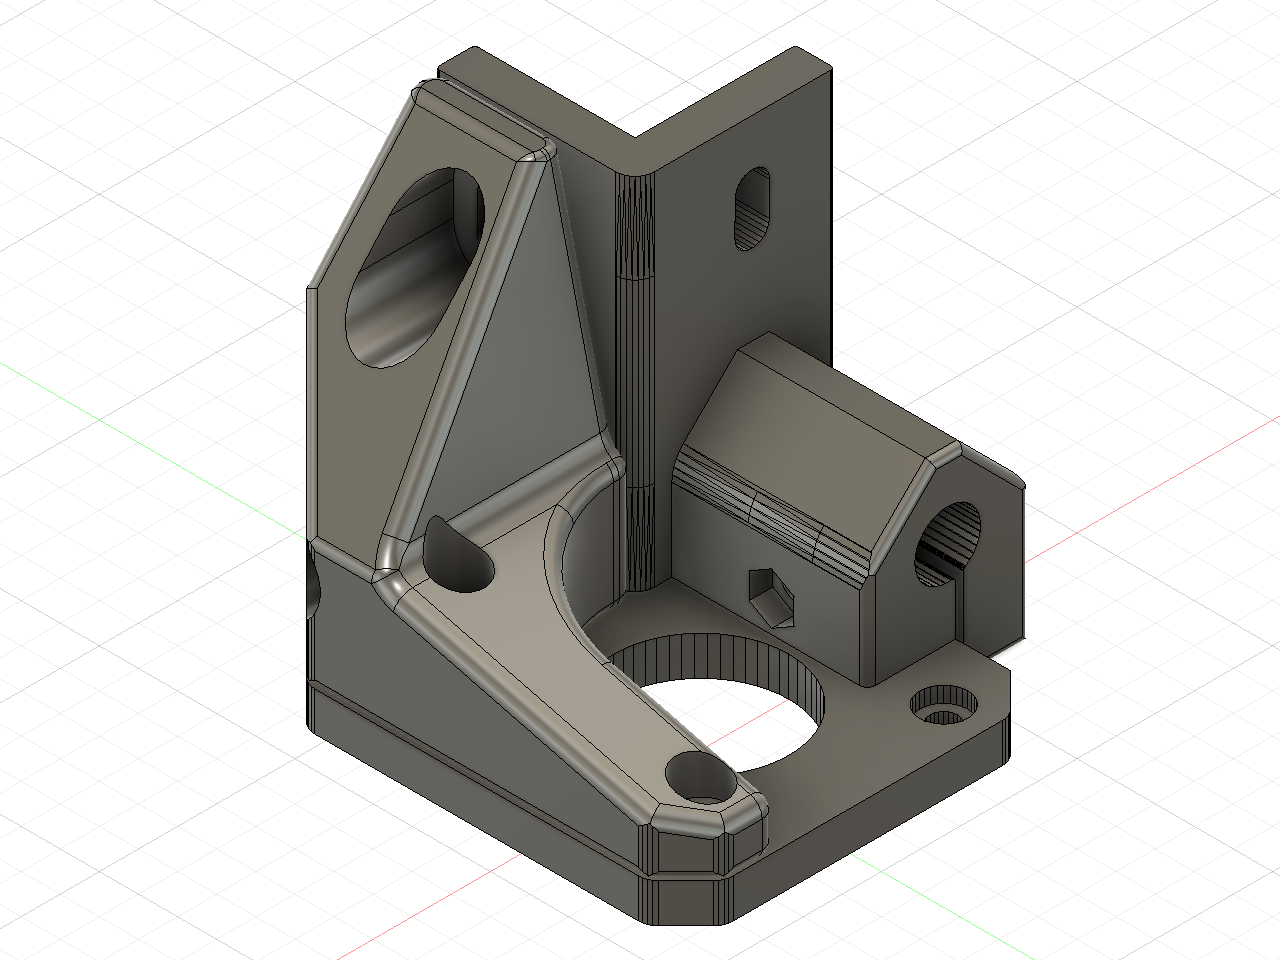
I remixed the XY Motor brackets from the ones from the Anet Evolution (Nut Remix) to extend the Y rod clamps by 10mm, this including the extra on the Idlers should make up the 20mm I have short on my Y axis guide rods.
To support the Y motor, I want to add a Y Motor support bracket, however this if for the Hypercube Evolution and therefore, will only fit 3030 aluminium extrusion. I have redesigned this to fit the motor bracket that fit 2020 extrusion
| Item | Quantity | Material | Size | Weight | Cost | Printed |
|---|---|---|---|---|---|---|
| XY Stepper Mount - Left | 1 | Amazon Basics PETG (Red) | 8.51m | 29.69g | £0.57 | ✔️ |
| XY Stepper Mount - Right | 1 | Amazon Basics PETG (Red) | 8.51m | 29.69g | £0.57 | ✔️ |
| Motor Brace Left | 1 | Tinmorry PETG (Black) | 5.50m | 19.19g | £0.38 | ✔️ |
| Motor Brace Right | 1 | Tinmorry PETG (Black) | 5.50m | 19.19g | £0.38 | ✔️ |
If there is too much flex from the printed parts I will replace the stainless steel guide rods with some 8mm carbon fiber rods. I can then easilly cut these to the exact size required with a Dremel and have the added benefit of making the gantry lighter.
Z Axis
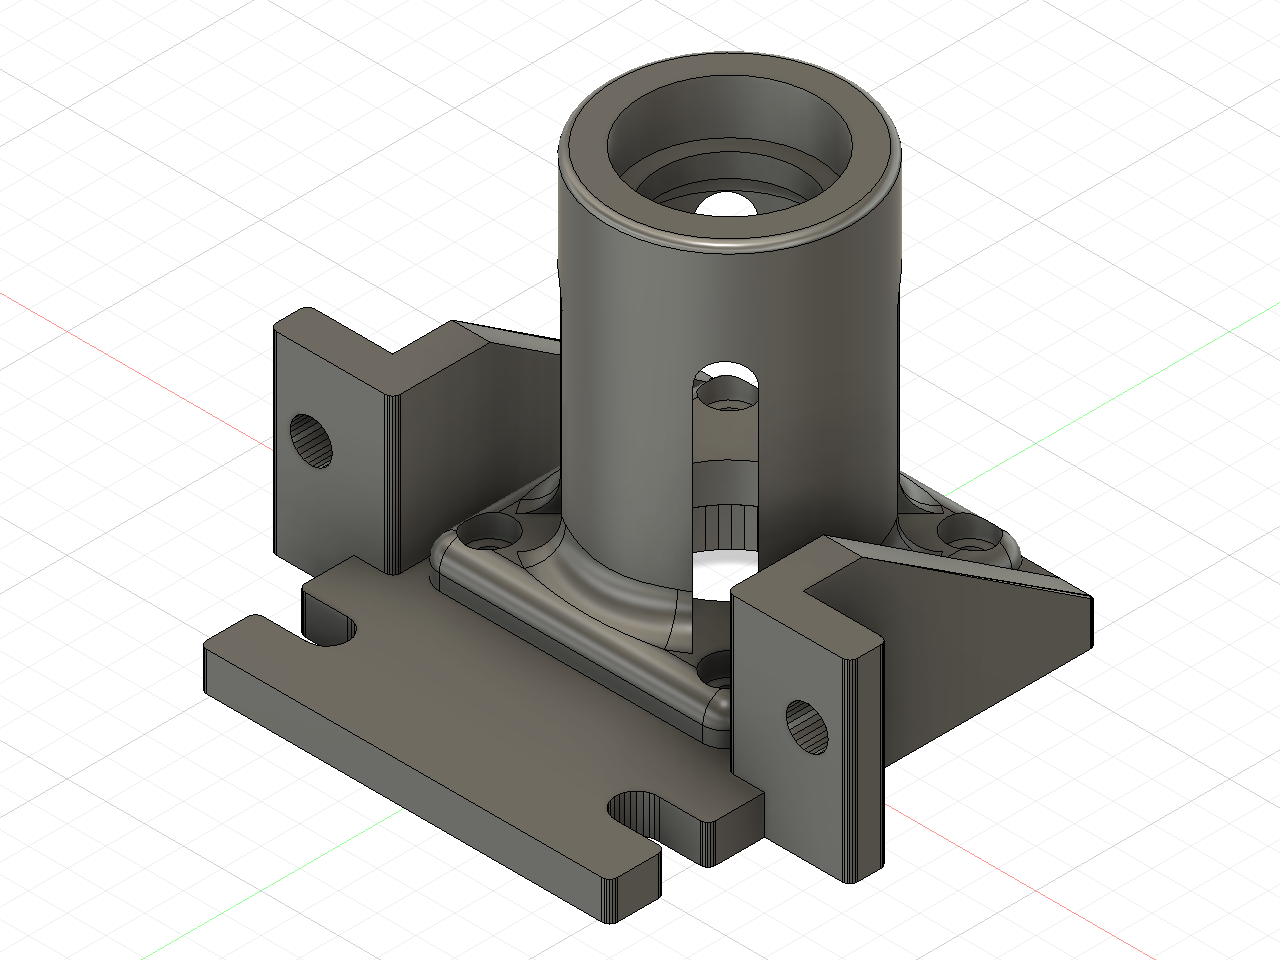
As I will be using standard Nema 17 motors, with separate lead screws, connected with the stock flexible couplers, I want to support the lead screw with standard 608 bearings.
I have designed a holder for the bearing to sit on top of the couplers inspired by the Z Axis Motor With Bearing Holder by butchja
| Item | Quantity | Material | Size | Weight | Cost | Printed |
|---|---|---|---|---|---|---|
| 2_Z_Motor_Mount | 2 | Amazon Basics PETG (Red) | 6.64m | 23.14g | £0.44 | ✔️ |
| Z Motor Bearing | 2 | Tinmorry PETG (Black) | 6.76m | 23.57g | £0.47 | ✔️ |
I have printed Z Axis anti wobble by osvalijr to support the top of the lead screw.
| Item | Quantity | Material | Size | Weight | Cost | Printed |
|---|---|---|---|---|---|---|
| 1 | Amazon Basics PETG (Red) | 6.27m | 21.87g | £0.42 | ✔️ | |
| 1 | Amazon Basics PETG (Red) | 6.27m | 21.87g | £0.42 | ✔️ |
NOTE: I am not fitting these as they are based on the top Z guide rod clamps that are too tall to fit on the Voron frame. I may remix them into the shorter bottom clamps at a later stage so that they will fit.
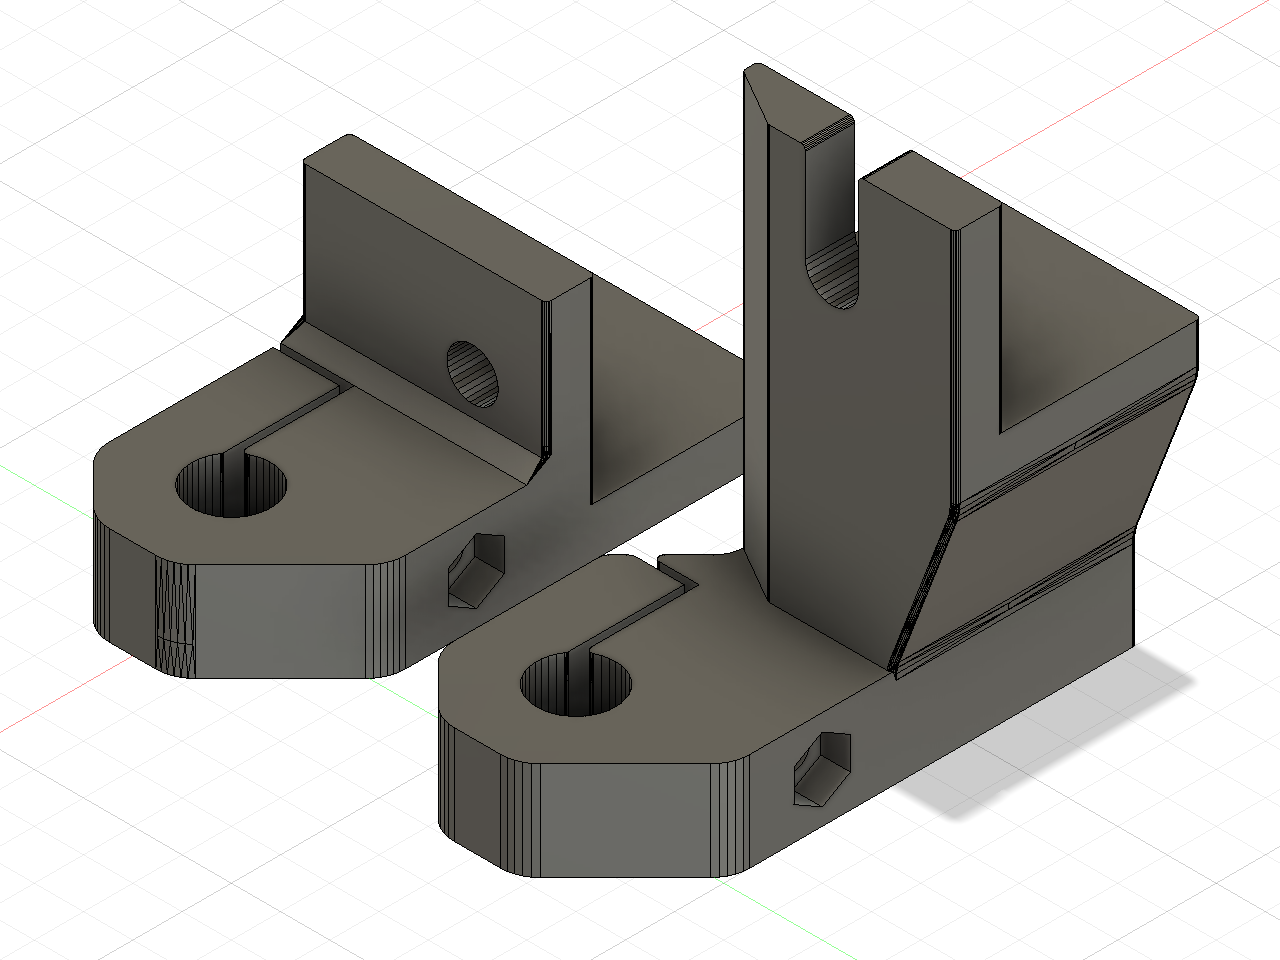
I have remixed the Z Rail Arms to recess the screw head so that I can use socket head screws instead of button head screws.
| Item | Quantity | Material | Size | Weight | Cost | Printed |
|---|---|---|---|---|---|---|
| Z Rail Arm Bottom Left | Tinmorry PETG (Black) | 3.09m | 10.78g | £0.22 | ✔️ | |
| Z Rail Arm Bottom Right | Tinmorry PETG (Black) | 3.09m | 10.78g | £0.22 | ✔️ | |
| 2 | Tinmorry PETG (Black) | 5.75m | 20.06g | £0.40 | ✔️ | |
| 2 | Tinmorry PETG (Black) | 5.75m | 20.06g | £0.40 | ✔️ |
NOTE: I am using another set of bottom mounts for the top as the top Z guide rod clamps are too tall to fit on the Voron frame.
Bed Mounting
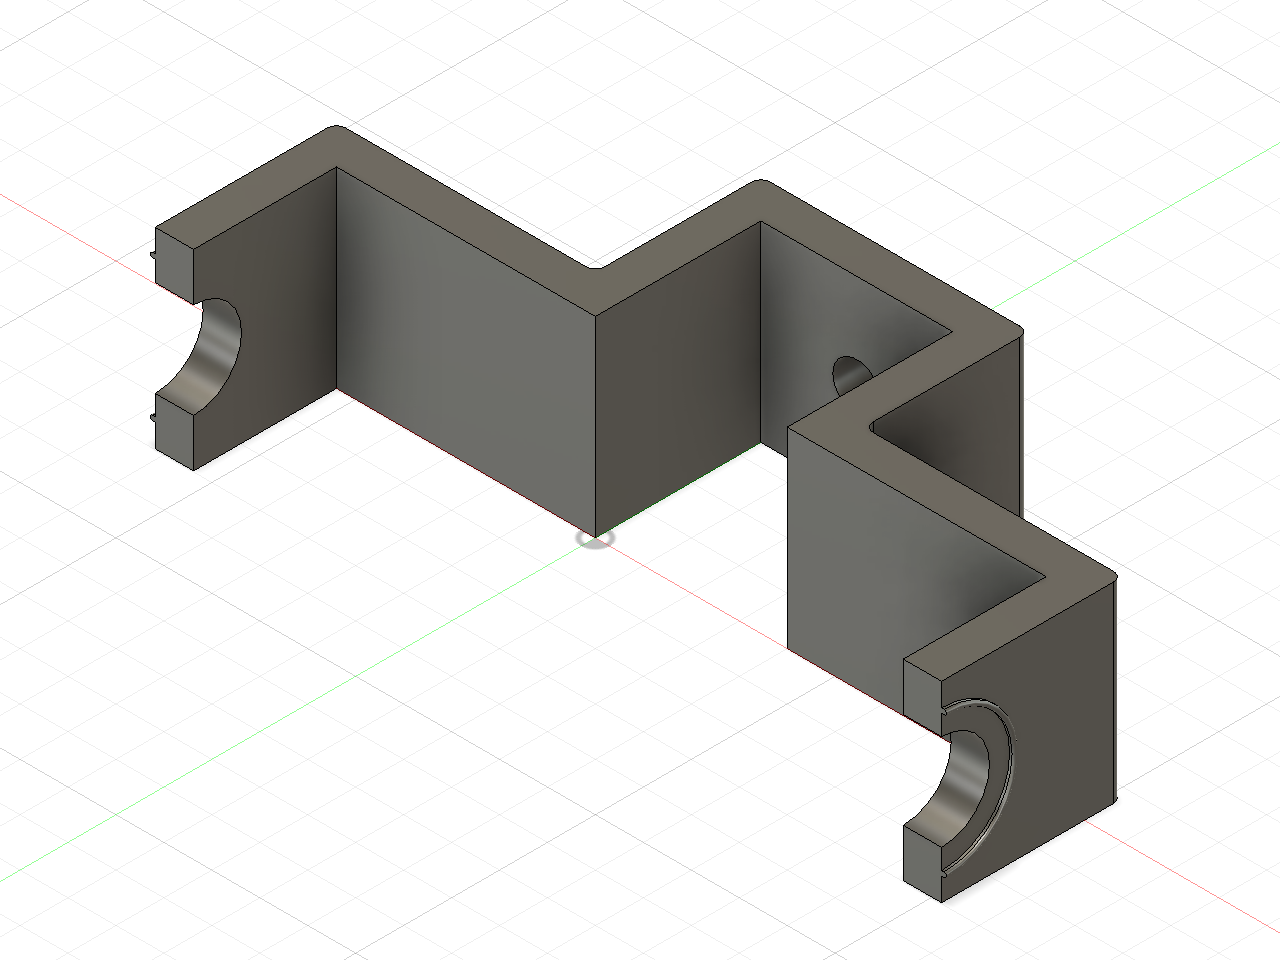
The bearing clamps to mount the bed carriage to the Z axis are from the Anet Evolution however, as I am using Igus DryLin RJ4JP 01-08 Bearings. The bearings are not as snug in the holders as the stainless steel ones. Therefore, I took inspiration from this Z Bearing Fixer by Budiman7x and redesigned them to fit my smaller 8mm guide rods.
| Item | Quantity | Material | Size | Weight | Cost | Printed |
|---|---|---|---|---|---|---|
| 2_Z_Axis_Holder | 4 | Tinmorry PETG (Black) | 10.97m | 38.26g | £0.76 | ✔️ |
| Z Bearing Fixer | 4 | Amazon Basics PETG (Red) | 4.30m | 15.00g | £0.29 | ✔️ |
| 2_Z_Nut_Braket | 2 | Amazon Basics PETG (Red) | 5.37m | 18.72g | £0.36 | ✔️ |
When the bed frame is assembled I will measure the difference between the bed and the frame and create some Bed Mounts remixed from something like the Anet Evolution Printerbed Holder.
Z Rail Arms
I have added some M3 nut traps to the Z Rail Arms. I have also printed 2 additional Bottom mounts to use at the top of the Z rails to allow more space for the Y Axis to move.
| Item | Quantity | Material | Size | Weight | Cost | Printed |
|---|---|---|---|---|---|---|
| Z Rail Arm Bottom Left | Tinmorry PETG (Black) | 3.11m | 9.5g | £0.18 | ✔️ | |
| Z Rail Arm Bottom Right | Tinmorry PETG (Black) | 3.11m | 9.49g | £0.18 | ✔️ | |
| 1 | Tinmorry PETG (Black) | 5.92m | 18.09g | £0.35 | ✔️ | |
| 1 | Tinmorry PETG (Black) | 5.92m | 18.08g | £0.35 | ✔️ |
Case
The Anet Evolution comes with STLs to print a case to attach to the 2020 aluminium extrusion, however it is for the stock Anet A8 board, I have upgraded mine to an SKR 1.4 Turbo. There are cases on Thingyverse that may work but as I am using a Voron Frame I might as well print the parts required for the Rear Electronics Enclosure and mount the electronics on DIN rails. This will require me to design some mounts similar to the Raspberry Pi bracket that I can mount the BIQU Mosfets for the heated bed and hotend.
Endstops
I am not sure whether to use the clicky switches that the Anet Evolution provides mounts for or search for optical endstop mounts that will fit 8mm guide rods. I will work this out after the frame is assembled and the guide rods are mounted.
Heated Bed
I am currently using a 12V power supply and the stock 12V Anet A8 heated bed. All current Voron printers use mains powered silicone heater mat, attached to a Cast Aluminium Tooling Plate and controlled by a Solid State Relay. This allows the heated bed to heat up to temperature quicker and holds a greater thermal mass for longer.
This upgrade will also increase the XY build volume from the stock Anet A8 build plate size of 220x220mm to 300x300mm.
Electronics
The Anet A8 uses a 12V power supply however modern 3D printers opt to use 24V as the heated bed can heat up quicker. I will eventually upgrade the 12V power supply to the one recommended on the Voron BOM, a Meanwell 24V one, this will also require me to upgrade the hotend heater and all fans to 24V versions.
Rebuild the Anet A8
Once I have upgraded everything to this point I should have all the original parts left over to rebuild it back into the original frame... or maybe reuse them to build a Voron Legacy? ;)